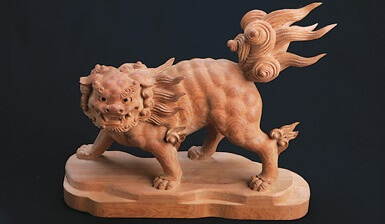
To begin carving a face in wood, select a piece of wood and make the required cuts. You can follow the expert's instructions using a step by step video. This will allow you to create a more realistic face by making the cuts in the wood. A lifelike face can be created by the progression of the noses on the wooden piece. In addition to the face outline, you may also choose colored dyes and shellac to add a realistic finish.
Hardwoods
Before carving a face out of wood, it is important to consider what type of wood you will be using. Hardwoods are broad-leaved trees that can grow in all climates. Hardwoods can be used for building and furniture construction due to their versatility in strength, density, and appearance. Hardwoods can be more expensive, but they are also more durable and resistant to fire.
You might want to try wood carving if you are new to the art. These woods are easy to work with, and are great for beginners. It is important to remember that hardwoods can have the same quality and finish while softer woods are not. It is important to try different wood types before you settle on one.
Softwoods
The first step to carving a face in wood involves choosing the softwood. Softwoods are often more difficult to carve and have more knots. They can also be more fragile if you use long strokes. Beginning carvers will cut small pieces of timber, decreasing detail. Although this is not a serious problem, it is important to be aware.
Some hardwoods are easier to work with than others. Aspen and butternut are the easiest hardwoods to work with. For this reason, it is best to use knives with a steeper bevel. Softwoods are much easier to work than hardwoods. You can also carve them along or across the grain. The quality and finish of your product will depend on what wood you use.
Colored dyes
To create a vibrant, detailed finish on a wood carving, try using colored dyes. These dyes can be purchased in many different colors. To create a unique color, you can add water or alcohol. For lighter woods, you can use colored dyes mixed with shellac. After applying dyes, ventilate your work area and clean your brushes with denatured alcohol. Another option is paste wax. You should be aware that excessive glossiness can distract from your work. Use 0000 steelwool to get rid of any excess glossiness.
You can easily apply wood dyes in many different types. Wood dyes are compatible all topcoats, and they are easy to use. They can solve common finishing problems. They are easy to mix and use because they come in many primary colors. You can also mix and match them to your liking. They can also be combined to create unique colors.
Shellac
You should always have a jar of shellac handy before applying it to wood carvings. Shellac can be purchased in a jar, but it's easier to apply with a brush. Two-pound cuts will suffice. This is because it will build up slowly and will reduce brush marks. A thicker cut is better than a thin one because shellac can be very water-thin. To ensure that you get enough, make your own pad using golf ball-sized chunks of cotton. Now dip your brush in the Shellac.
Shellac can be used to highlight and add color to your grain. Shellac comes with a wide range of colors. You can mix different shades to make your own custom blends. You can darken the shade with extra coats of lac. Shellac, unlike other wood finishes won't turn yellow or become cloudy. You can also make more faces with it because it lasts longer. You can do this with almost any type of woodcarving project.
Gouges
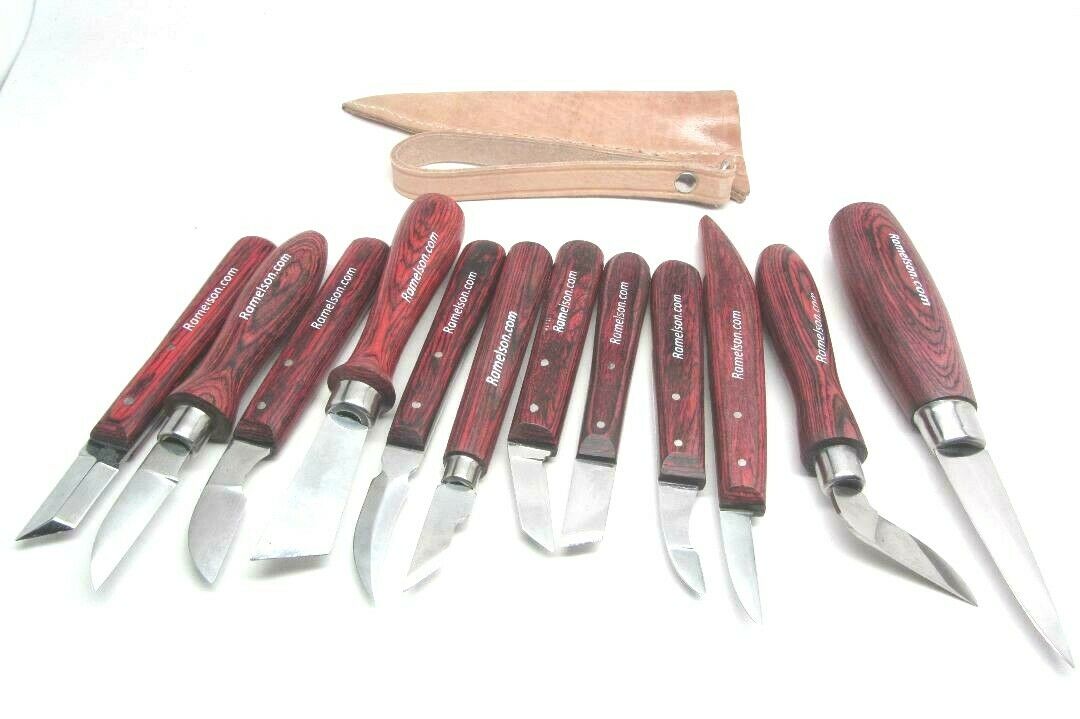
There are many different sizes and shapes available for gouges. The straight and the palm gouges types are the most commonly used. Straight gouges are meant to be held by the hand while palm gouges use shorter shafts and more manageable handles. Hand held carving becomes much easier when the handles are shorter. Palm gouges are also called veiners and are ideal for carving faces in wood. Here are a few things to consider before you start carving.
First, you should know how to choose the right gouge. The gouge should be capable of carving a small v-shaped groove. Use a sharp, narrow edged tool. Gouges can be categorized by their size. A 3/10-inch gouge will produce the same size cut as a 5/10-inch gouge. The scoop between the edges will get deeper and the sweep will become more curled as the first number goes up. A small gouge can create a profile with a narrow sweep.
FAQ
What is the hourly rate for a woodworker?
The hourly rate of a professional woodworker depends on many factors including experience, skill level, availability, location, etc.
An average hourly rate for skilled woodworkers ranges between $20-$50.
A less skilled woodworker can charge as low at $10 an hour.
What is the average time it takes to finish furniture?
It depends on which wood you choose, how complicated your design is and what amount of finishing you apply. For example, hardwoods require more maintenance than softwoods. Hardwoods tend to be more expensive that softwoods. But they last longer and resist moisture better. The average time it takes to finish furniture is one week to three weeks.
What is the difference in plywood and particleboard?
Plywood is made of layers of wood that are pressed together under pressure. Plywood can be cut to different thicknesses. It's commonly used as flooring and cabinets. Particle board is made up of sawdust mixed in resin, then compressed into large pieces. This board is commonly used in home improvement projects. Both types of boards are durable and easy to cut.
Do you have any suggestions for starting a woodworking shop?
It is hard work to start a woodworking company. But if you're passionate about your hobby, you won't mind putting in the effort. You'll likely enjoy the challenge of owning your business.
One thing to keep in mind when launching a new venture is that you might encounter unexpected problems along the way. You might run out money, or you may have to borrow unexpectedly. Or maybe you'll find that customers aren't willing to pay as much as you'd hoped. You must be ready to deal with such situations in order to survive.
It is a good idea to create a separate bank account just for your company. This will ensure that you always know how much money has come in.
What kind of wood should I use?
The most popular types of wood used in woodworking include oak, pine, birch, maple, cherry, mahogany, teak, poplar, redwood, and bamboo. Each type of wood has its own unique characteristics that can affect the final product's appearance. Oak, for instance, is darker and harder than most other woods. Birch is soft and lightweight, while mahogany is denser and heavier. You can also choose from solid wood or veneers. Veneers are thin sheets of wood that are glued together to form a single layer.
What else should I know about woodworking in general?
It is easy to underestimate how much work it takes to make furniture. Finding the right kind of wood is the most difficult part. There are so many varieties of wood available that choosing one can be difficult.
Another problem is that not all wood has uniform properties. Woods can warp, split, or crack over time. These things should be considered before you buy wood.
Statistics
- Average lumber prices rose about 600 percent between April 2020 and May 2021. (familyhandyman.com)
- The U.S. Bureau of Labor Statistics (BLS) estimates that the number of jobs for woodworkers will decline by 4% between 2019 and 2029. (indeed.com)
- Most woodworkers agree that lumber moisture needs to be under 10% for building furniture. (woodandshop.com)
- Woodworkers on the lower end of that spectrum, the bottom 10% to be exact, make roughly $24,000 a year, while the top 10% makes $108,000. (zippia.com)
External Links
How To
How to join wooden boards without using nails
Woodworking is a hobby that many people enjoy doing. Woodworking is a relaxing hobby that allows you to use your hands to create useful things from wood. There are times when two pieces of wood need to be joined together. This article will show you how to do it to make your woodwork projects look great.
You will first need to trim the edges of your wood pieces before joining them. Do not leave any sharp corners as they could cause problems down in the future. After you have completed this step, you are ready to glue your boards together.
If you are working with hardwood, only one side should be glue. You should glue both sides if you are working with softwoods such as pine and cedar. Apply the glue to the boards and press them down until they are securely attached. After applying the glue, let dry the boards before proceeding to the next stage.
Once you've glued your boards together you will need to drill holes in the joints to accommodate screws. These holes will differ depending on the type and size of screw you are using. For example, if you're going to use a 1/2-inch wood screw, then you should drill a hole that is at least 3/4 inches deep.
Once you have drilled your holes you will need to drive the screws through each joint and into the backside. Avoid hitting the board's top surface. Otherwise, you could ruin the finish. When driving the screws, try to avoid hitting the ends of the screws too much. This will help prevent splitting of the end grain.
Now that your project is finished, you'll want to protect it from the elements. You can seal the furniture pieces or cover the top. You will want to choose a product that will be durable for many years. Oil-based varnishes are, among others, polyurethanes shellac, laquer, and other oil-based products.
These products can generally be found in any home improvement shop. Make sure you get the right product for your job. Some finishes are toxic and should not ever be used indoors. Wear protective gear whenever you are handling them.