Chip carving can be difficult if you've ever tried it. There are many styles and techniques you can use, but which one is the best? What tools do I need? This article will give you my top tips and tricks when carving chips. You can carve potato chips in a traditional or more modern way, but there are some essentials that will help you succeed.
Traditional
Chip carving is one form of decorative woodcarving that dates back to the beginning. The knife must be straight-edged, but an offset or skew-ground knife can also work. Chip carving is a technique that involves making small, triangular incisions into wood in order to create a pattern. This art form originated over 1,000 years ago. Because of its widespread popularity, the designs were often so similar across nationalities that it was impossible to discern one from another.
As wood carving spread across the globe, generations passed down the skills. Chip carving was used in Sweden to decorate furniture. Schools were eventually established to teach this art. The skills and knowledge of carvers from centuries ago have benefited modern chip carvers. Through generations, the knowledge and experience of carvers was passed on from apprentice to student. It is a long-lasting process that continues today.
No cost for form
You've come to right place if you've ever wanted to learn chip carving. Murray Taylor gives you a DVD on how to create geometric and freeform carvings. It is an excellent introductory project with plenty of information. English and NTSC formats can be found. The DVD can be purchased in stereo or widescreen. Artisan Media Ltd. is the owner of DVD. It is also available in MP4 format for Windows or Mac computers.
Triangles, circles and lines are the basic shapes of geometric chip carving. This technique is flexible and can be used in a variety of styles. This technique is also known by the free-form style of chip carving. Regardless of whether you want your chips to be a flower or a dragon, it will be a wonderful addition to any room. It is possible to combine many techniques in one piece using free form chip carving.
Techniques
Chip carving has been around since the beginning of time. Many countries have examples of chip carving. Chip carvings have been discovered on paddles and handles for ceremonial tools in the South Pacific Islands. The carvings were likely made using pieces of bone and seashells, although some people also used shark teeth. This book will show you how to create amazing designs by using different chip carving techniques.
You can easily carve chip if your follow some basic steps. First, you need to learn how to carve the fine triangular shape. This pattern is very easy to comprehend and execute. To carve this pattern you will simply need to make several triangles. Then, repeat this process. But this doesn't mean you have to carve boring patterns. By changing the triangles, it is possible to create many different patterns.
Tools
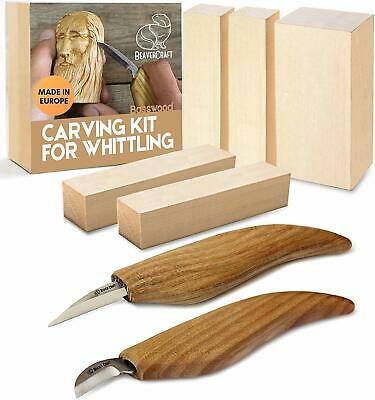
Lora Irish offers an online seminar for free that will cover the basics of chip-carving. You will learn how to use various tools and supplies for carving, such as a chip knife and stab knife. In this free seminar, Irish also covers the different types of wood carving tools. To purchase the right tool, you can choose from this list. These tools can create simple shapes and designs. Or, you can work more intricately to create more intricate designs.
A chip carving knife uses special geometry. It measures approximately one-half inches in length and has a narrow, curved edge at the back. This allows for precise incisions. It is also important to choose a sharp, needle-sharp point so that the edges meet perfectly. Chip carving knives are also made of stainless steel and come with a sharp tip. A chip-carving knife should be sharp enough for cutting a small piece of wood.
Getting started

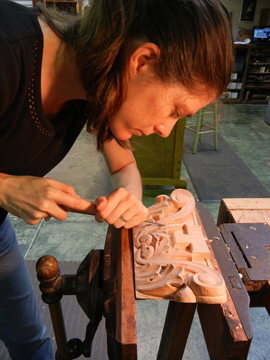
Before you can begin chip carving, it is important to understand the process. The type of carving you want to do will affect the process. To make your work as accurate and precise as possible, it is important that you are familiar with these basic principles. The chip carving method involves making a pattern in the wood. Here are some steps to help you create your first chip-carving.
When using a chip carving knife, it is essential to sharpen it well. The blade of the chip carving knife will have bevels on each side, indicating that it is a primary chip carving knife. The sharpening stone is shaped like a diamond and can produce efficient edges. Place it at a 10 degree angle. The stone will both sharpen and shave the chip carving knives and tool simultaneously.
FAQ
Where do I get my woodworking supplies?
There are many places you can get everything you need, and you don't have to go far. For example, you could visit local hardware stores or look online at websites like Amazon.com.
You can also search flea and garage sales for furniture and other materials that can be reused.
How do I know what tools are best suited for me?
It helps to reflect on your needs and preferences before you shop for tools. What do you prefer: metal or plastic handles? What size are you most comfortable using for screws and nails? Would you rather use hand tools than power tools?
What is the minimum amount I will need to start?
There are no exact numbers because every project is different. Here are some factors to help you estimate how much money you will need.
-
Material costs
-
Tools and equipment
-
Time spent on the Project
-
Hourly rate
-
What is your expectation for profit?
-
Hire help
Start small, if possible. You can make simple boxes or picture frames if you're just getting started. You will gain more experience and be able to tackle larger projects.
Statistics
- The U.S. Bureau of Labor Statistics (BLS) estimates that the number of jobs for woodworkers will decline by 4% between 2019 and 2029. (indeed.com)
- Most woodworkers agree that lumber moisture needs to be under 10% for building furniture. (woodandshop.com)
- Overall employment of woodworkers is projected to grow 8 percent from 2020 to 2030, about as fast as the average for all occupations. (bls.gov)
- In 2014, there were just over 237,000 jobs for all woodworkers, with other wood product manufacturing employing 23 percent; wood kitchen cabinets and countertop manufacturing employing 21 percent. (theartcareerproject.com)
External Links
How To
How to join hardwood without using nails
Woodworking is an enjoyable hobby. You can make useful items from wood with your hands, which is both relaxing and fun. However, there are times when you want to join two pieces of wood together without having to use nails. This article will explain how to do this so that your woodwork projects stay beautiful.
The first thing you'll need to do is cut off any rough edges from your pieces of wood before joining them together. You don't want to leave sharp corners that could cause problems later on down the road. Now you can start gluing the boards together.
If you are working with hardwood, only one side should be glue. If you're using softwoods like pine or cedar, you should put glue on both sides. Apply the glue to the boards and press them down until they are securely attached. Before you proceed to the next step, be sure to let the glue dry completely.
Once you've glued your boards together you will need to drill holes in the joints to accommodate screws. Depending on the type of screw that you use, the size of these holes will vary. For example, if you intend to use 1/2-inch wood screws, you need to drill a hole that is at most 3/4 inches deep.
Once you have drilled the holes, the next step is to drive your screws through the joint into the board's backside. Don't hit the board's surface. You could damage the finish. When driving the screws, try to avoid hitting the ends of the screws too much. This will prevent splitting in the end grain of the wood.
Now that your project is finished, you'll want to protect it from the elements. You have two options: seal the whole furniture piece or just the top. You'll want a product that lasts for many years. Some examples include oil-based varnishes, polyurethane, shellac, lacquer, etc.
These products are available at most home improvement stores. Just make sure that you buy the right kind for the job. Some finishes are toxic and should not ever be used indoors. So, always wear protective gear when handling them.