You can begin with the basics if you are a beginner in whittling. You will need a knife and wood. You'll learn all about tools, techniques and different wood types in this article. Once you know the basics, it's easy to start your own whittling venture. There are many types to choose from when it comes to whittler projects.
Wood
There are thousands upon thousands of wood types. But these woods are best for whittling. The woods on this list are great for beginners who want to learn how to whittle. There are many methods to whittle wooden pieces to make different shapes. Here are some simple methods for whittling wooden objects.
Pull stroke: Keep your blade parallel to wood grain when carving. This will help avoid damaging the wood. To tell the direction of the grain of wood, look for dark streaks running through the wood. The direction of these streaks will be the direction of the blade when whittling wood. When using the pull stroke, the blade will not cut through the wood as effectively as the push stroke.
Knife
If you're new to woodworking, whittling with a knife can be a good way to try your hand at the craft. While you may not be an expert at this process, the right technique will give you great control over the knife and make it easier to make detailed cuts. By cutting small strips of soap using a knife, you can practice pulling strokes. Practice makes perfect. Beginning projects are simpler to manage and become more difficult as you move on.

Before starting whittling, you'll need a knife. A pocket knife is ideal, as it is sharp enough to produce shavings with a sharp blade. Avoid knives with large, long blades. These can lead to choking. Instead, pick a knife with a narrow bevel, which will make it easier to hone. You can also use a frame saw if necessary.
Techniques
There are several techniques that can be used to improve your whittling abilities. Pull stroke is the most popular cut. This involves placing your right thumb on the piece of wood and pinching your left fingers. Now, hold the knife straight while drawing the blade towards your thumb. This stroke allows for quick control and a very short stroke. This technique is best for detailed cuts.
There are two primary types of whittling books. If you're just starting out, the Old Time Whittling Book is a good book to refer to. The Little Book of Whittling is another good book that has a large variety of whittling ideas. Many whittling ideas can be found in The Whittling Handbook. The Art of Whittling has some advanced projects. This book includes simple puzzles and patterns like ball and cage.
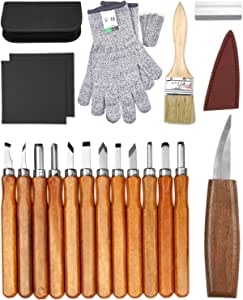
Tools
To make whittling tools, the first step is to find suitable wood for your projects. It's possible to use found wood but it is more efficient to get greenwood. It is much easier to carve greenwood than dry wood. Deadfall branches can be collected at any time. Small trees can also be collected at any season, but the best time to collect them is in the winter. You must ask permission to collect wood if you are working on private property.
There are many great sets for beginners. The Delicacy Carving Set includes 12 tools as well as a blank for a wooden spoon and a knife-sharpener. This set also includes protective gloves, a carry bag and a pouch. Because you'll be using these tools for a long time, it is worthwhile to invest in a set. This set is also an affordable way to get started.
Starter projects
If you are new at wood whittling, it is worth starting with something simple, such as a walkingstick. You can progress to more complicated projects like carving faces on walking stick. Comfort Birdie: This bird is perfect for beginners. A swan is an excellent beginner project in whittling. These are great gifts and easy to make for children.
A carved ball inside a cage is another beginner project. You can create intricate designs and use feathers to match your theme. Tiki idols can also be created. There are many options, but it is always a good idea have a template to help you get started. You'll be able to identify which tools are best and what parts you don't need.
FAQ
How do I know what type of wood I'm dealing with?
Always check the label before purchasing wood. The label should include information about the wood species and its moisture content as well as whether or not it has been treated using preservatives.
How can a beginner woodworker make money?
Many people are looking to create their own furniture and start an internet business. However, if you're just getting into furniture building, there are other options than selling on Etsy. Sell at craft fairs or other local events. A workshop could also be offered for people who are interested to learn how they can build their own furniture. If you have experience as a carpenter or builder, you might consider offering services such as remodeling homes or creating custom pieces for clients.
Which wooden products are most popular?
Wood that has been harvested sustainably is the best-selling type of wood.
The most popular types of wood for furniture include oak, maple, cherry, mahogany, walnut, and teak.
These woods are extremely strong but also have beautiful colors and grain patterns. They can also last for years if they are properly cared for.
To prevent moisture damage, wood furniture should always first be painted. This applies to all surfaces including drawers, doors, handles, and handles.
A paint that resists water is the best choice to ensure that furniture lasts a long time.
Use a high-quality, oil-based primer and two coats of topcoat. It is possible to apply multiple coats depending on how heavy the wear.
You should avoid using aerosol paints or spray cans. These products are contaminated with solvents, which evaporate rapidly and can leave behind toxic fumes.
Where can I find free woodworking plans?
For free woodworking blueprints, you don’t need to read any magazines or buy any books. Just search Google. Just enter "free woodworking" into the search bar, and you'll see hundreds of websites where you can download free plans.
Where do I start with woodworking?
The best way to learn how to build furniture is by building furniture. You will need tools. There are bound to be mistakes. But if your persistence is consistent, you will soon master the craft.
Begin by choosing the project that you want to finish. It could be something as simple as a box or as elaborate as a full-scale entertainment center. Once you have settled on a specific project, it is time to find a woodworker in your area who is experienced in such work. Ask him or her for advice on what tools you'll need and where to find them. Maybe you can ask the person if they know of anyone who does this sort of work.
What kind wood should I use for my project?
The most commonly used woods for woodworking are oak, maple, cherry. Every type of wood is different and can have a unique look and feel that will affect the final product. Oak, for example, tends be darker and more hard than other woods. Birch is soft and lightweight, while mahogany is denser and heavier. You can also choose between solid wood and veneers. Veneers are thin sheets of wood that are glued together to form a single layer.
You can learn how to woodwork.
Learning by doing is the best way of learning anything. Woodworking is an art form that requires patience, practice, skill, and experience. To master any craft, it takes time.
The best way to learn how to do something is actually to do it. So start small and build on what you have learned from there.
Statistics
- Average lumber prices rose about 600 percent between April 2020 and May 2021. (familyhandyman.com)
- Most woodworkers agree that lumber moisture needs to be under 10% for building furniture. (woodandshop.com)
- In 2014, there were just over 237,000 jobs for all woodworkers, with other wood product manufacturing employing 23 percent; wood kitchen cabinets and countertop manufacturing employing 21 percent. (theartcareerproject.com)
- Overall employment of woodworkers is projected to grow 8 percent from 2020 to 2030, about as fast as the average for all occupations. (bls.gov)
External Links
How To
How to stain hardwood
Staining wood can be described as a process where chemicals are applied to the wood surface. This causes the wood to take on a new color. This chemical reaction changes the wood's color from white to brownish. While oak is the most widely used type of wood for staining purposes, other types of wood are also available.
There are many options for applying stains to wood surfaces. Mixing the stain in a solvent such as turpentine and spraying it onto the wood is one method. Others use a solution made up of water and dye, which is then applied directly onto the wood. Stains can also be mixed into paints and varnishes, becoming part of the finish coating.
Preparing the wood surface is the first step to staining it. Cleaning the wood thoroughly removes any dirt or grease that could interfere with applying the stain. Sanding smoothens scratches and rough spots. Next, you need to decide which stain you want. There are two main types of stain: non-penetrating and penetrating. Penetrating and non-penetrating wood stains penetrate deeper than other types, making them perfect for dark colors like mahogany. The best non-penetrating colors are those that work with light colors like maple.
Once you have decided on the stain type that you want, get your tools ready. A paintbrush works well for applying stains because it allows you to spread the liquid evenly across the surface. A few rags are also handy to clean up any spillages after you have finished painting. If you plan to mix the stain yourself, make sure you have enough containers available to hold the different components of the mixture.
After you have prepared the materials, you can clean the area where you want to stain the wood. Use soap and warm water to remove dust and grime. Wipe down all furniture pieces with a dampened cloth and clean water. Make sure you eliminate any loose debris, especially if you plan to stain darker wood.
Next, apply the stain. Apply the stain by brushing or spraying it onto one side of the furniture. Slowly and carefully work your way along the grain to reach the opposite end. The stain should not drip off of the wood's edge. Before proceeding to the next step, let the stain dry thoroughly.
Protect the painted surface with a coat polyurethane paint sealant. Apply three coats polyurethane sealer. Allow the third coat to dry overnight before sanding the final coat.