
Chattahoochee Woodturners joined forces with Eagle Ranch to help build a woodturning facility on the school's campus. Woodturners received an Educational Opportunity Grant from American Association of Woodturners as well other donations for the construction of the facility. Local woodturners donated their tools and equipment to help get the project off its feet. All students are welcome to use the woodturning studio, and adults with disabilities can also use the woodshop.
Hark Woodturner
The woodturning program at the Harvard University's Mather Building began around eight years ago when a resident tutor approached Hark after a class. Hark said yes to the offer and agreed to teach the class at Harvard. After several unsuccessful attempts at teaching Harvard's course, Hark found an old lathe that was not in use. The first Harvard class was started the following spring. Today, all Harvard Houses welcome students to the woodturning class. He also continues to instruct woodturning weekends.
Arthur and Pamela, in addition to their teaching duties, have visited woodworking trade shows and symposiums in order to meet new audiences. They have met a wide variety of world-renowned artists and have hosted them as their guests. Their woodturning workshops have featured a range of artists and styles, from emerging to famous, and the studio has sent a Knight and Commander to the Norwegian Woodturning Cruise, held every three years.
Tools
One of the most important items to have in your woodturning studio is safety gear. Eye protection, safety goggles, visors, and eye protection are all good options to protect your eyes from the harsh glare caused by sand. Sharpening tools can also be an investment. To sharpen your lathe blades, you will need to purchase safety gear.
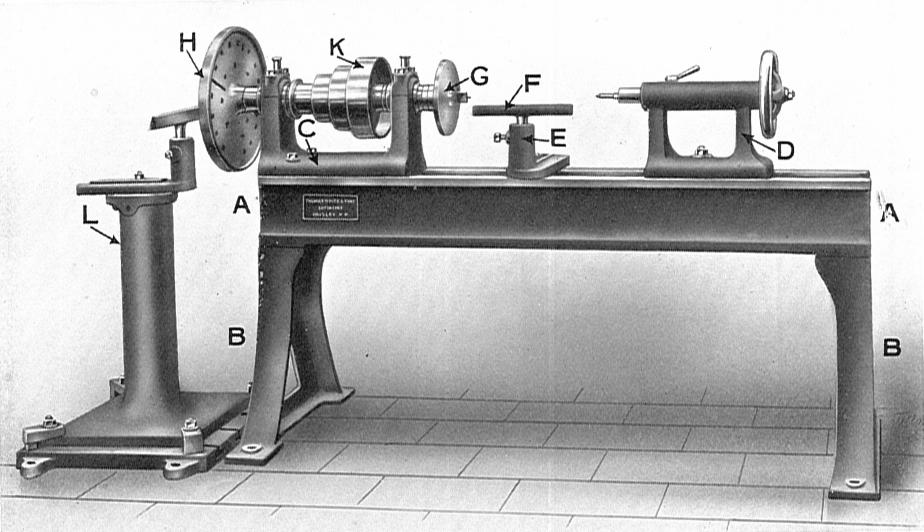
The banjo, a screwdriver and a drill are some of the most essential tools you will need. The banjo allows you to slide your turning tool along the bed of the lathe, supporting the toolrest. This allows you to hold the turning tool in the most convenient location. Modern lathes come with a locking mechanism that locks the banjo. These tools will help you create your custom creations.
Techniques
You should be able to use the right tools and techniques whether you are woodturning for hobby purposes or as a professional. These tools are crucial for creating functional and beautiful pieces that will be both functional and attractive. These tools can be purchased online or at your local woodworking shop. The process of turning wood is time-consuming, but the results are well worth the effort.
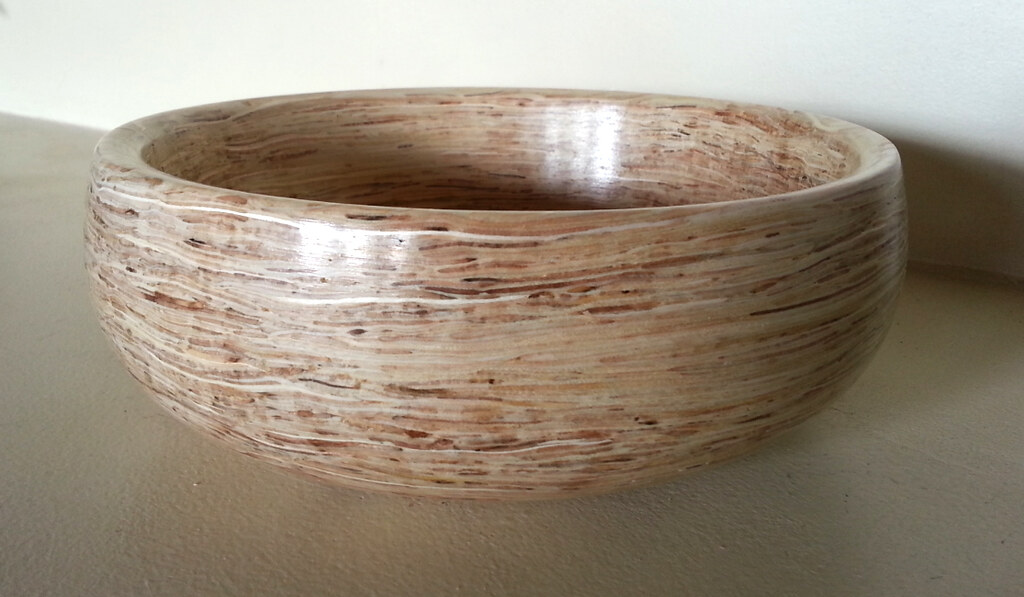
If you are just starting out, a woodturning class is a great way to learn the basics. The workshop covers everything, from safety gear to selecting the right tools and techniques. You will also get hands-on experience using a lathe. While you'll learn the basics of using tools, you'll also have the opportunity to put your new skills to work. Your projects may vary depending upon your existing skills. They could include making bottle stoppers, bowls, or carving mallets.
Class size
If you are new to woodturning and are interested in learning the basics, a beginner's workshop at a woodturning studio in Durham, NC, may be perfect for you. During this class, you will learn how to use tools, sharpening tools, and basic technique. The class will also include several projects. Safety will be stressed by the instructor. Bring a face mask or other protective equipment.
It will allow you to put your focus on each student and their learning. The instructors will have plenty of time to answer questions and provide individual attention. There will often be six or fewer students in a class. This allows for a more relaxed learning environment. Many of the classes are project-based and will take place over a couple of days. Private lessons for the more advanced student can focus on specific techniques.
Cost
It will cost a lot to set up your own woodturning workshop. Equipment and supplies can easily cost several thousand dollars. Sell your finished products for a fair price to help you save money. In fact, selling your finished products will double or even triple your profits. Although high-end products are a great way of promoting your art and generating profits, it's also possible to sell items at lower prices. While high-end items may take longer to produce, you can always sell simple items in this price range. They are often sold out within two days of an art exhibition.
A class will give you the foundations of woodturning. This will include safe use of tools as well as proper sharpening. This will allow you to move on to more difficult projects and teach you more advanced tools and techniques. Usually, the cost of an introductory woodturning class is $75 for residents of Mather and Harvard affiliates. All materials and tools included in the cost. The price includes all materials and tools.
FAQ
What is the average time it takes to finish furniture?
It depends on which wood you choose, how complicated your design is and what amount of finishing you apply. Hardwoods, for example, require more maintenance than softwoods. Hardwoods are also more expensive than softwoods. However, they are stronger and more resistant to moisture. The typical time taken to finish a piece furniture takes anywhere from one to three month.
How long does it take you to finish a piece?
It depends on the size and condition of the furniture. For smaller projects such as picture frames and boxes, it can take less than a day to complete. Larger projects like dining tables and desks require several days. It takes time to properly stain and seal wood.
Is there a way to start my own woodworking company?
Starting your own woodworking business isn't easy. There are many laws and regulations you need to be aware of. However, it doesn't necessarily mean you must go through all the hassle of setting up a business. Many people opt to join existing businesses instead. This will allow you to avoid paying membership fees and taxes.
What kind of tools are used to carpenters?
A hammer is probably the most widely used tool for carpenters. A hammer helps to carpenter pound nails into the wood. It is also used to help hold pieces together while working on a job. Other tools include clamps. pliers. screwdrivers. measuring tape. pencils. saws. drills. wrenches.
Statistics
- Overall employment of woodworkers is projected to grow 8 percent from 2020 to 2030, about as fast as the average for all occupations. (bls.gov)
- The best-paid 10 percent make $76,000, while the lowest-paid 10 percent make $34,000. (zippia.com)
- Most woodworkers agree that lumber moisture needs to be under 10% for building furniture. (woodandshop.com)
- The U.S. Bureau of Labor Statistics (BLS) estimates that the number of jobs for woodworkers will decline by 4% between 2019 and 2029. (indeed.com)
External Links
How To
How to join two pieces of wood together without nails
Woodworking is a popular hobby. You can make useful items from wood with your hands, which is both relaxing and fun. However, there are times when you want to join two pieces of wood together without having to use nails. This article will demonstrate how to do so to preserve the beauty of your woodwork.
Before you can join the wood pieces together, you need to remove any rough edges. Do not leave any sharp corners as they could cause problems down in the future. Now you can start gluing the boards together.
If you're working with hardwood, you should only apply glue to one side. You should glue both sides if you are working with softwoods such as pine and cedar. After applying the glue, press the boards firmly until they are completely stuck together. Make sure you let the glue dry before moving on to the next step.
After you glue your boards together, drill holes at the joints where screws will be inserted. The size of these holes depends on what type of screw you choose to use. If you are going to use a half-inch wood screw, you will need to drill at least 3/4 inch deep.
Once you've drilled your holes, you'll want to drive the screws through the joint and into the backside of the board. Be careful not to hit the front surface of the board, or else you'll ruin the finish. Avoid hitting the screws' ends too often when driving screws. This will avoid splitting in the wood's ends grain.
Once your project is complete, it's time to protect it against the elements. You have two options: seal the whole furniture piece or just the top. It doesn't matter what method you use, you want something that will last many years. Some examples include oil-based varnishes, polyurethane, shellac, lacquer, etc.
These products are available at most home improvement stores. Make sure you get the right product for your job. Don't forget to keep in mind that some finishes are toxic. When handling certain finishes, wear protective gear.