
You have come to the right place if your curiosity has led you to learn how to use a Belt Sander. These tips will help you to maintain a firm grip while selecting the best abrasive sander belt. The first thing you need to know is how to use the machine safely. If you don’t know how to properly use the belt sander, you could inflict injury.
Keeping a firm grip on a belt sander
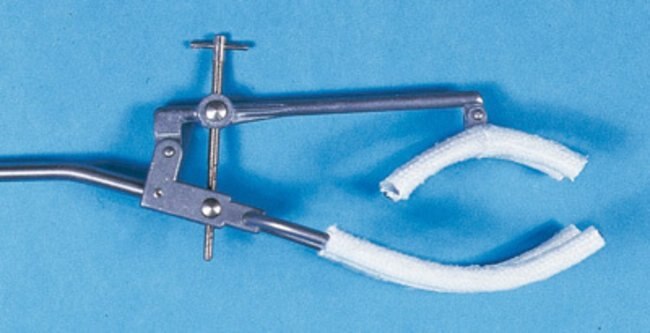
Before operating a belt sander, ensure that it is turned off and that it has the correct sanding belt. If you are unsure how to align the belt with its front pulley, adjust the screw. You must maintain balance when using the belt sander. Regularly adjust the belt tracking. This will ensure the belt sander works at its best.

Abrasive belts that are fine and durable
Abrasive belts can be rolled sheets of abrasive-paper attached to joints. They are angled between 45 and 80 degrees from the running direction of the belt. This helps avoid abrupt transitions at a belt's junction. Choosing a fine abrasive belt can make a big difference in your production speed. You can also select from a wide range of materials and weights.
Avoiding sandpaper buildup
It is essential to ensure that you follow the correct grit pattern and don't overload your sanders in order to prevent sandpaper buildup. This is important, as excessive loading or too high of a removal rate can lead to burned belts. Avoid dust buildup on your workpiece as this can cause premature wear.
Use a belt sander with care
Safety precautions must be taken when operating a beltsander. Eye protection is essential. Make sure you remove all dust from any metal pieces before using the sander. Wearing earplugs, or a face shield, can help prevent damage to your ears and hearing from the belt sander. Protect your ears from the high-def noises coming from this machine by wearing long pants, gloves, and a dust shield.
Get better results using a belt sander
It is easy to get better results using a belt sander, but there are some things you need to do before you start sanding. Your stance is important. You should ensure that you have the sander in your hands. Next, turn on the machine and place the stock in front of the sander belt. Sand along the grain.
FAQ
What material would you recommend to start learning woodworking?
You can start with softwoods like pine or poplar. After you are comfortable with the softwoods, move to hardwood.
Is it possible to learn woodworking by yourself?
Doing is the best way to learn any subject. Woodworking requires patience, practice and skill. To master any craft, it takes time.
To actually learn something is the best way. So start small and build on what you have learned from there.
Where can I locate free woodworking plans
To find free woodworking plans, you don't have to buy any magazines or books. Just search Google. Search Google for "free woodworking" to see hundreds of sites that provide free plans.
Do you know anything more about woodworking?
Furniture making is a laborious task. It's easy not to appreciate how hard it is. Finding the right kind of wood is the most difficult part. It is difficult to choose between the various types of wood.
Another problem is that not all wood has uniform properties. Woods can warp, split, or crack over time. You must take these things into consideration before purchasing wood.
Where do I start with woodworking?
Building furniture is the best way to learn how furniture is made. You'll need tools, and you'll have to make mistakes along the way, but if you keep at it, you'll eventually figure out what you're doing.
Start by choosing a project you'd like to complete. It can be something as simple and small as a box, or large-scale as an entertainment center. Once you've settled on a project find a local skilled woodworker. Ask the local woodworker for help in deciding what tools and where to get them. It's possible to ask your friend if they do this type of work.
How do you calculate woodworking prices?
The most important thing to remember when calculating costs for any project is to keep them as low as possible. Always ensure you are getting the best possible price for materials. It is also important to consider the costs of other factors, such time, skill, and experience. Our guide to the average household DIY task price will give you an idea of how much it costs to complete different types of woodwork projects.
Statistics
- The U.S. Bureau of Labor Statistics (BLS) estimates that the number of jobs for woodworkers will decline by 4% between 2019 and 2029. (indeed.com)
- Woodworkers on the lower end of that spectrum, the bottom 10% to be exact, make roughly $24,000 a year, while the top 10% makes $108,000. (zippia.com)
- Overall employment of woodworkers is projected to grow 8 percent from 2020 to 2030, about as fast as the average for all occupations. (bls.gov)
- Most woodworkers agree that lumber moisture needs to be under 10% for building furniture. (woodandshop.com)
External Links
How To
How to stain wood
Staining wood refers to applying chemicals to wood's surface. This chemical reaction causes the wood to change in color. This chemical reaction causes wood to turn from whiteish to brownish. Oak is the most commonly used wood for staining, but other woods can also be stained.
There are many options for applying stains to wood surfaces. Some methods include mixing the stain along with a solvent like turpentine and then applying the mixture to the wood by brushing or spraying. You can also apply a solution containing water and dye directly to the wooden surface. The stain can be mixed with paints and varnishes to become part of the final coating.
The first step in staining wood is preparing the surface. You must clean the wood well to remove any grease or dirt that might interfere with the application of the stain. Sanding the wood removes scratches and imperfections. You must then decide on the type of stain that you wish to use. There are two basic kinds of stains: penetrating stains and non-penetrating stains. Penetrating stain penetrates deeper into wood than nonpenetrating, making them suitable for dark colors like mahogany. The best non-penetrating colors are those that work with light colors like maple.
After choosing the type and application method you prefer, gather your tools. Because you can spread the stain evenly with a paintbrush, it is ideal for applying them. To remove any stains left behind after painting, you will need some rags. If you are planning to mix your stain, ensure you have enough containers for each component.
After you have prepared the materials, you can clean the area where you want to stain the wood. Use warm water and soap to clean away dirt and dust. Use a dampened sponge and warm water to clean the entire piece. Take care to remove all debris and dirt, especially if you are planning on staining darker wood.
Next, spray the stain. The stain can be applied by spraying or brushing the stain onto one end of the furniture. You should work slowly and carefully. Continue moving along the grain until you reach your opposite end. Keep the stain from dripping off the wood's surface. Let the stain dry completely before proceeding with the next steps.
Protect the painted surface with a coat polyurethane paint sealant. Apply three coats of polyurethane sealer. Let the third coat dry overnight before you sand the final coat.