You may have to adjust the angle or top bar of a lathe to accommodate your fingers if it does not have the right tool rest. Most tool rests have flat spots on the top bar that allow your fingers and thumbs to move back and forth. Some are adjustable, and can fit most lathes. While others have multiple height settings. Here are some features you should consider when buying a lathe tool rest:
Light source
If you don't know what a light source is for a toolrest on a lathe you are not alone. Many lathes can be equipped with overhead lighting or fixtures that attach to the ceiling, headstock or other areas. These lights offer additional lighting, but can block operator access. A tool rest equipped with an integrated lightsource is the best choice when you have a larger lathe.
A tool rest for lathes includes a horizontal arm and a vertical post. A light source is attached to the tool arms' front side. It should be preferably an LED strip. The strip is attached to an electrical power source by means of a wire 20. Alternative options include a tool rest that doesn't require a light source. This invention will make it possible to design a tool rest for a lathe which includes a lighting source.
Support element
The Support element of tool rest for the lathe solves several problems related to unexpected movements of the toolrest. In the prior art, the support element for the toolrest is a point-to–point abutting arrangement. Because the toolrest is required to bear torque, axial force and tooling during the process of tooling, the friction generated is not sufficient to support the toolrest. This design poses safety risks. The toolrest is supported stationary by the Support element of tool rest for lathe to resist torque and axial force during tooling.
A toolrest for lathes usually consists of a bar that can be raised. The bar provides restraint and may have grooves or a sleeve for locating the tool. Some models include a handle to help you turn the tool. This can be either a metal or a wood toolrest. The edges of wooden toolrests need to be smoothed. But, if you are unable to afford a support for your lathe tool rest, you can still get a wooden one.
Adaptive device
The adaptive device 100 is an externally cylindrical piece of sleeve that has a head and a section with threads, as well as a portion 274 at its outer edge and 150 at the end. The shoulder 140 is milled to form a flat surface 160 that can hold set screws 370 in lathe holder 311. The set screw 370 is pressed against the flat side 160 to secure the adaptive device within the lathe.
The Mortimer's pin rest claims that it is gated. However, the support rod rides nearly parallel to its tool shaft. Therefore, it should provide sufficient levering power. However, the gate of this device is exceptionally wide, which almost certainly suffers from cam locking. Although this tool rest is an improvement on standard tool rests, it has few benefits in terms of motion restriction and fine tool control. It is not a good choice for those who need complete tool control without sacrificing precision.
Cutting tool
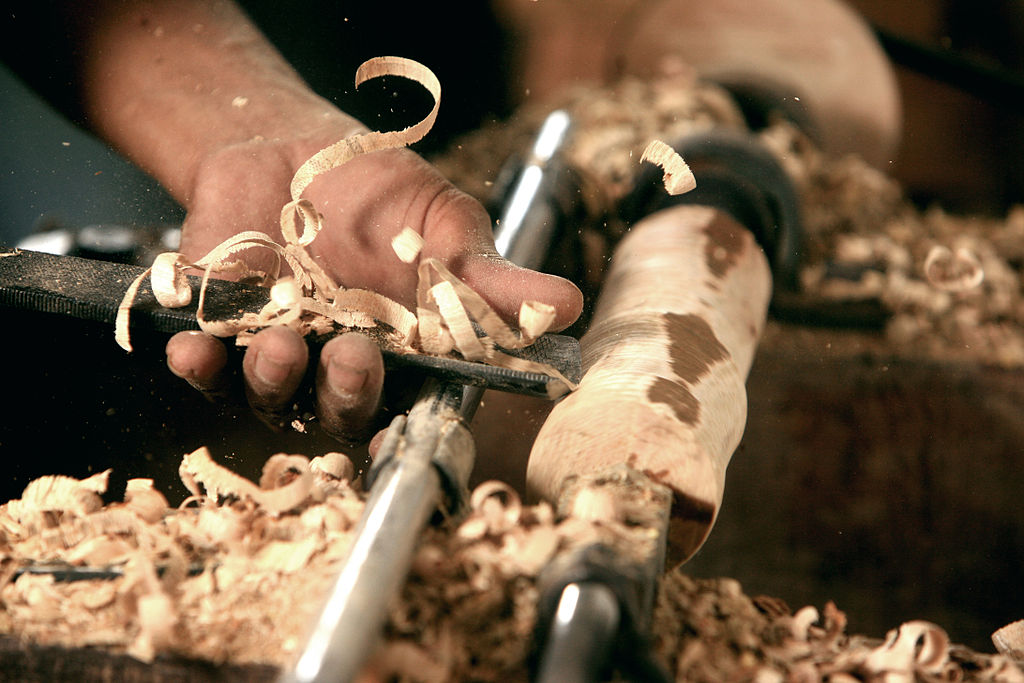
A cutting tool rest is a must-have accessory for any lathe user who is new to the craft. This accessory allows you to hold your tool as close to wood as possible during its rotation. The body of a toolrest is sloped backward from the forward edge, which helps you position your tool at an optimal angle for effective cutting. You can smoothen the surface of your cutting tool rest by using a file.
For your lathe's cutting tool rest, make sure to look for one with flat spots. This will keep your fingers from scratching the surface. This type of tool rest is also ideal for handwork, as it keeps your hands from slipping off the cutting tool. It helps keep the workpiece in place when it is turned at high speeds. There are several sizes to choose from for your lathe. A professional can help you choose the right size for your lathe.
FAQ
Can I refinish my own furniture?
Yes! You don't have to hire a professional to refinish furniture. There are many ways you can do it yourself. Here are some ideas:
Use sandpaper for removing stains and scratches. Use a clean cloth to wipe the surface.
Clear polyurethane varnish should be applied. Allow to dry thoroughly before moving furniture.
Use acrylic paint to paint furniture.
Use stain instead of paint. The furniture will have a rich look thanks to the stain.
Use shellac wax. Applying wax will give the wood shine and protection.
What wood items do well?
Wood that has been harvested sustainably is the best-selling type of wood.
The most used wood types for furniture are oak, maple and walnut.
These woods are very strong, but they also have beautiful grain patterns and colors. They also last for many years if cared for properly.
To prevent moisture damage to wood furniture, it is important that it be painted before any other surfaces. This applies to all surfaces, even drawers and doors.
You want your furniture to last as long as possible so you need to choose a paint that is water resistant.
Followed by two coats, you should apply a quality oil-based primer. Depending on how much wear you expect, you might need to apply more coats of topcoat.
Avoid spray cans or aerosol colors. These products contain solvents which evaporate quickly and leave behind harmful fumes.
How often should I buy new supplies?
You will likely need to replace some tools over time. Hand tools will need to be sharpened regularly. You'll also need to replace parts if you use power tools. Spread your purchases over several months to avoid purchasing too many items at once.
What is the difference between a hobbyist or a professional woodworker, and how can you tell?
Hobbyists enjoy making things out of wood, whereas professionals focus more on the quality of their work. Hobbyists usually take pride in their creations and often share them with friends and family. Professionals spend hours researching design ideas before starting to work on a project. They will meticulously plan every detail of their work from choosing the right materials to finishing it.
Statistics
- Woodworkers on the lower end of that spectrum, the bottom 10% to be exact, make roughly $24,000 a year, while the top 10% makes $108,000. (zippia.com)
- Most woodworkers agree that lumber moisture needs to be under 10% for building furniture. (woodandshop.com)
- Average lumber prices rose about 600 percent between April 2020 and May 2021. (familyhandyman.com)
- In 2014, there were just over 237,000 jobs for all woodworkers, with other wood product manufacturing employing 23 percent; wood kitchen cabinets and countertop manufacturing employing 21 percent. (theartcareerproject.com)
External Links
How To
How to stain wood
Stain wood is a process that involves applying chemicals to the surface of wood, which changes its color. This chemical reaction causes the wood color to change from white and brownish red. Oak is the most common wood type for staining. However, you can also use other wood types.
There are many ways to stain wood surfaces. Some methods involve mixing the stain with a solvent (such as turpentine) and then brushing or spraying the mixture onto the wood. Some methods involve a mixture of water and dye that is applied directly to the wood. You can mix stains into varnishes or paints to make them part of your finish coat.
Preparing the surface for staining wood is the first step. You must clean the wood well to remove any grease or dirt that might interfere with the application of the stain. Sanding the wood smooths out rough spots and scratches. The next step is to determine the type of stain you would like to use. There are two main kinds of stains available: non-penetrating stains and penetrating. Penetrating stain penetrates deeper into wood than nonpenetrating, making them suitable for dark colors like mahogany. The best non-penetrating colors are those that work with light colors like maple.
Once you have decided on the stain type that you want, get your tools ready. Paintbrushes are great for applying stain because they allow you to evenly spread the liquid across the surface. It is a good idea to have rags on hand in case you need them to clean up any stains that may remain after you have finished painting. If you intend to mix the stain yourself you will need enough containers to hold all the components.
After you have prepared your materials for staining, clean the area. Clean the area with soap and warm water to get rid of dirt and grime. Wipe the entire piece of furniture with a rag dampened with clean water. If you intend to stain darker wood, make sure you get rid of any debris.
Apply the stain next. The stain can be applied by spraying or brushing the stain onto one end of the furniture. Slowly and carefully move along the grain of wood, slowly but steadily, until you reach the other end. The stain should not drip off of the wood's edge. Before proceeding to the next step, let the stain dry thoroughly.
To protect the painted surface, apply a coat of clear polyurethane sealant. Apply three coats of polyurethane sealer. Allow the third coat to dry overnight before sanding the final coat.